

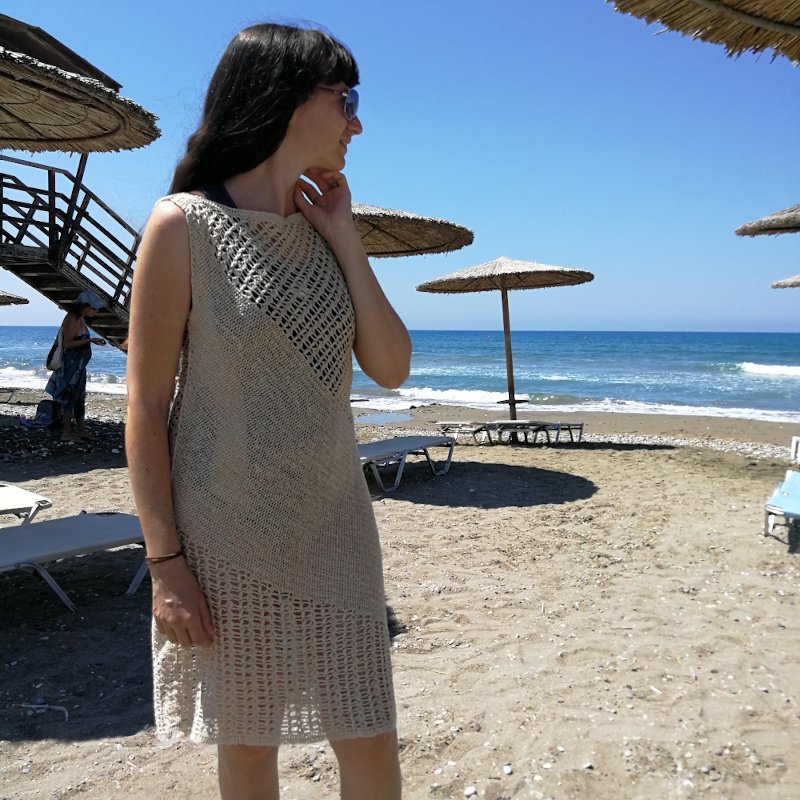
Crocheting The Shore Thing Dress with Lace Weight Hemp Yarn
I wanted to share with you how I crocheted The Shore Thing Dress by Rohn Strong with lace weight hemp yarn. I am petite and so it seems with most crochet patterns for garments I need to crochet the smallest size or, like with this beach dress, adjust it to make it even smaller. I ended up crocheting it twice, changing the yarn and unravelling a lot of work to get the right size.
As you already know, I love using hemp yarn for crochet and the lace weight that I had in my stash was a perfect match. I absolutely love how it turned out and the drape is beautiful. So I wanted to write out my process here for anyone who has a similar shape and size to me so you can avoid doing what I did. I really hope it helps.
Size Details
Just how small am I? My measurements are listed below along with the size of the dress I ended up making.
My Height: 156 cm
My Waist: 31”
My Hips: 38”
Dress Length: 33”
Dress Width: 17.5” radually narrowing towards the top to 15”.
What you will need to make this size
I initially made the dress using fingering weight hemp yarn (bad move!) with a 3mm hook which came out to the correct gauge as stated on the pattern but the final dress ended up being way too big for me. The pattern suggests a superfine (lace weight) yarn so make sure you stick with that. I had to unravelled my first attempt and start again with the following.
Yarn: Roughly 260g of lace weight hemp yarn
Hook: 2.5mm
Gauge
Making a swatch of the shell pattern (i.e. shells and clusters as it would be for the top and lower section of the dress) the gauge measurements with this yarn are as follows:
Pattern Repeat Gauge: 3.5 pattern repeats and 15 rows over 4” (10cm).
Measure the pattern repeats from the beginning of a cluster and you should end up with 4 clusters and 3 shells over 4” (10cm).
HTR Gauge: A half double crochet (UK half treble crochet) swatch makes 25 sts and 18 rows over 4” (10cm).
What Adjustments Did I Make?
Yarn
Knowing that following the smallest pattern size with fingering weight yarn and the hook suggested by the pattern made a dress way too large for me, I decided to switch my yarn to a lace weight option and drop the hook size.
The lace weight yarn was a game changer. The pattern recommends a superfine yarn so don’t try to be clever like me and change it to something bigger even if you achieve the correct gauge as you won’t get the drape needed for the dress to not look like a bag. 😂
Size
I decided to continue following the smallest size on the pattern (XS/S) beginning with 121 fdc. I was fairly confident after making my new swatches that following the smallest size would still be ok with some amendments.
The Lower and Top Shell Sections
Follow the pattern as stated for the lower shell and top shell sections. After making the lower shell section, I made sure I was on the right track by measuring it against my body before continuing any further. I didn’t want to make something that wouldn’t fit for the second time.
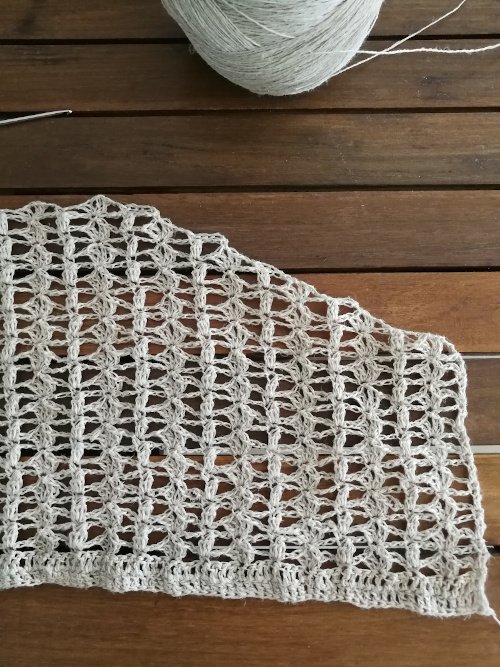
The Hdc Bias
This section is the best place to make any adjustments if needed and trust me I needed it 😂 If I had followed the pattern, it would have ended up down to my ankles, which is ok but not what I wanted.
I think the best way to share what I did here is to talk about the number of rows rather than the measurement, as it is more accurate. I followed the first 3 rows as stated in the pattern for the bias and then continued a repeat of rows 2 and 3 until I ended up with 57 rows in total.
Blocking
Blocking is super important here. It is normal for this pattern to end up with both panels (front and back, as they’re the same) looking a little wonky. The side of each panel where the bias reaches the shoulder ends up longer than the other side. It’s ok! Don’t panic :) Here is where blocking comes in handy.
I used the wet blocking method here which I think worked really well with 100% hemp yarn. I blocked each panel separately following the same procedure and the same measurements to make sure they ended up the same. This way, when I came to stitch them together the stitches matched up fairly evenly.
Firstly, I filled the sink with water, added a drop of natural laundry liquid and fully immersed the panel. Make sure it is completely wet whilst being careful not to twist or massage the panel much. We’re just wetting the material not washing it at this point.
When you’re happy that it is completely wet, get as much water out as you can without wringing or stretching it. Gently squeeze it between your hands as best you can.
Lay it on your blocking mat or, as I did, on a towel on a large piece of cardboard and pin your panel into shape. I pinned the length to 33” long and 17.5” wide from the bottom up to 4” from the top.
The top 4” I decided to taper in a little, gradually to 15" at the very top so that the shoulder pieces weren’t hanging passed my shoulders. I would suggest measuring your panel against your body before wet blocking so that you can make your own adjustments or be sure you want to taper at the top.
Wait for it to dry and that’s pretty much it, you’re ready to stitch the two panels together and weave in your ends.
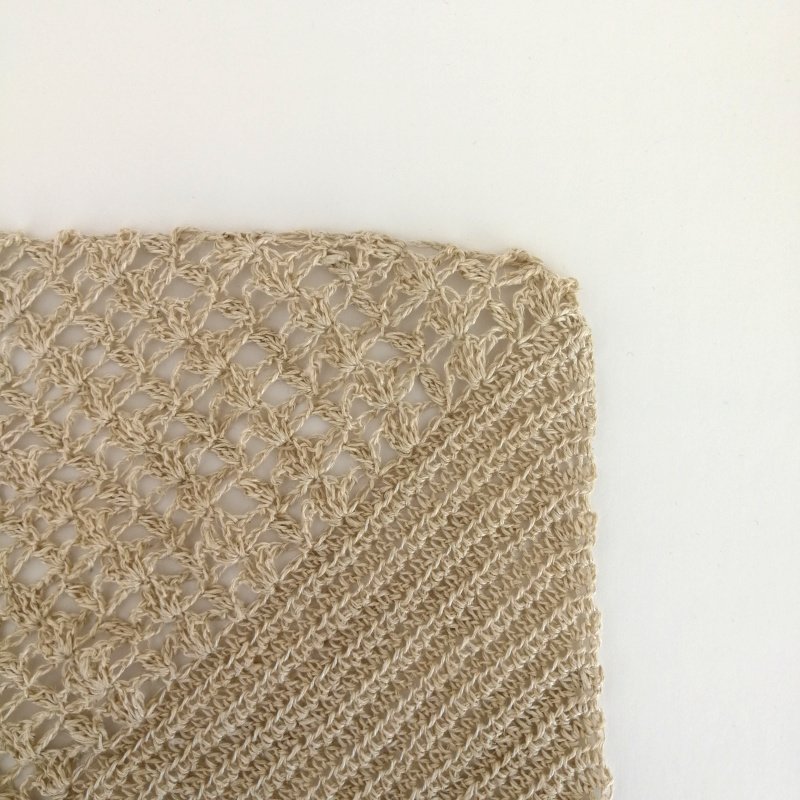
A close up of where the top shell section meets the hdc bias.
Let me know in the comments if you’ve made The Shore Thing Dress and how it worked out for you. I really love wearing mine, it’s my favourite handmade garment to date. The 100% hemp yarn really makes it something special, the drape is so lovely and it fits perfectly.