

How to Make Dried Orange Slices for Decoration
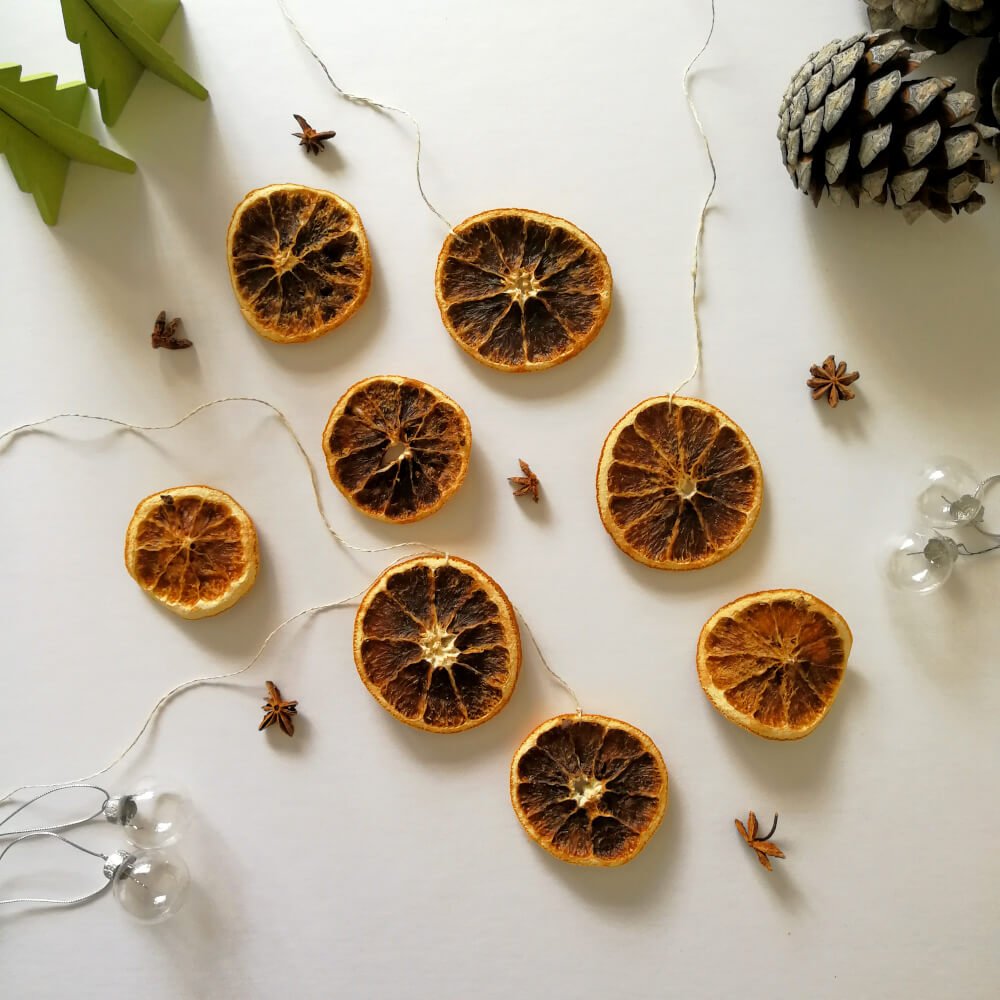
Dried orange slice garlands are one of my favourite DIY natural Christmas decorations.
They’re so easy to make and the process brings out the Christmassy feels in me because they fill the house with their gorgeous scent; setting the tone for the holiday period.
In this blog post, I’m going to show you how to make dried orange slices, zero waste style, and how to store them so you can use them year after year.
How to Decorate with Dried Orange Slices
The great thing about making dried orange slices is that they are so versatile.
You can use them for both decoration and for culinary uses and, even though we have linked them to Christmas, they can be used for any occasion because they’re just oranges and have no real theme :)
Here are some of my favourite ways to use them for decoration.
Make a Garland
String them up using a natural fibre like hemp, linen or cotton string to make a garland that you can hang across your mantlepiece, chimney breast or above picture frames or mirrors.
Be sure to thread the string through the flesh of the slice and not the pith. You can also add other bits and bobs to the garland like cinnamon sticks, pine cones, acorns, or holly.
Attach Them to a Gift
Are you making some jam or jars of bath salts as gifts? These orange slices would be perfect to attach to them for some decoration.
Use a piece of natural string to thread through the orange slice and tie it around the jar.
Make Tree Ornaments
Thread a piece of natural string close to the peel and hang them on your Christmas tree. Your festive lights will shine through the orange slices giving a warming glow and feel to the room.
Attach them to a Wreath
Adding a few orange slices to a wreath makes all the difference in my opinion. They give a burst of colour against the greenery.
Make your wreath as usual and then simply thread some string through the slices individually and attach them to the base, making sure to hide the string with your leaves.

How to Make Dried Orange Slices
What You Will Need
You don’t need any fancy tools or equipment to make dried orange slices. That’s what makes this so easy! Here is what we’ll be using.
Oranges
Oven with a metal rack
Knife
Chopping board
Cloth or kitchen towel
Cloves or other spices (optional)
Instructions
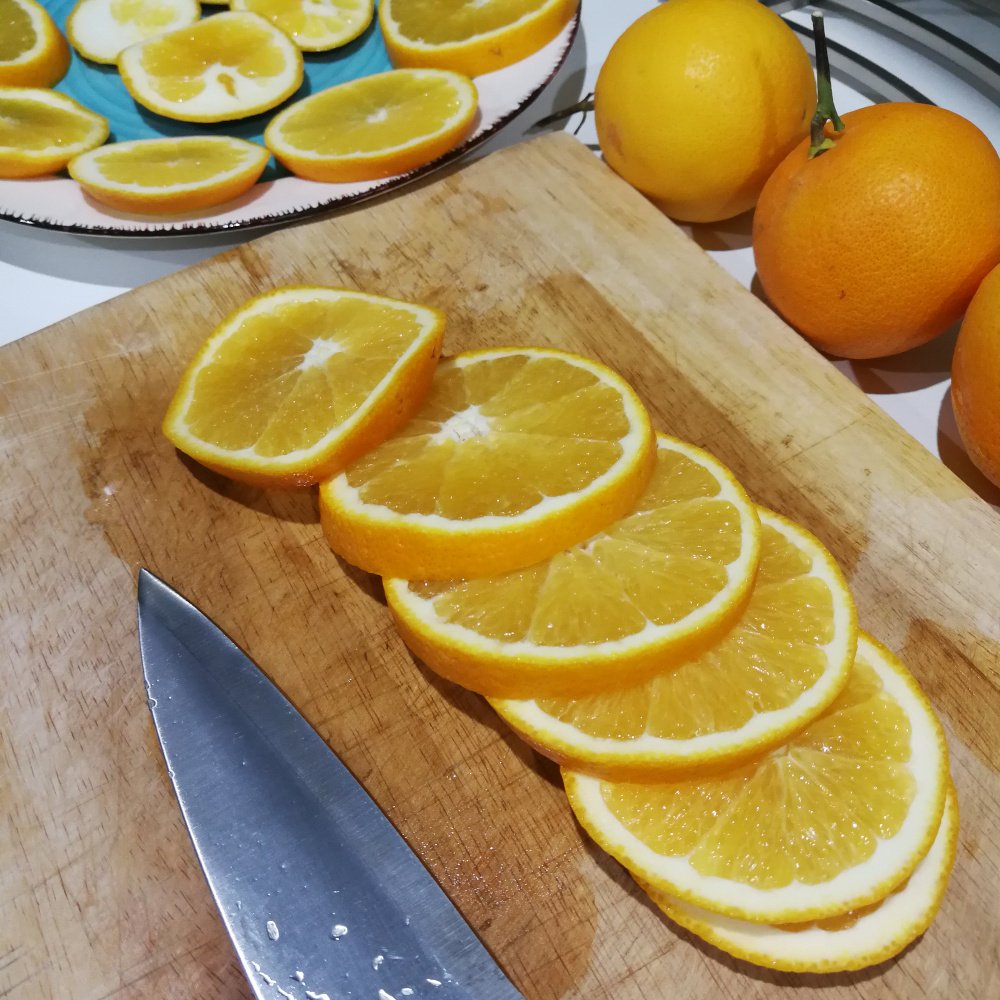
1. Start by slicing your oranges to about 3-4mm thick. The thinner they are the quicker they will dry but you don’t want them too thin so they end up breaking.

2. Then, soak up as much moisture as you can from each slice. Usually paper towels are used here but using a cloth or kitchen towel works just as well. So keep those paper towels out of the bin :)
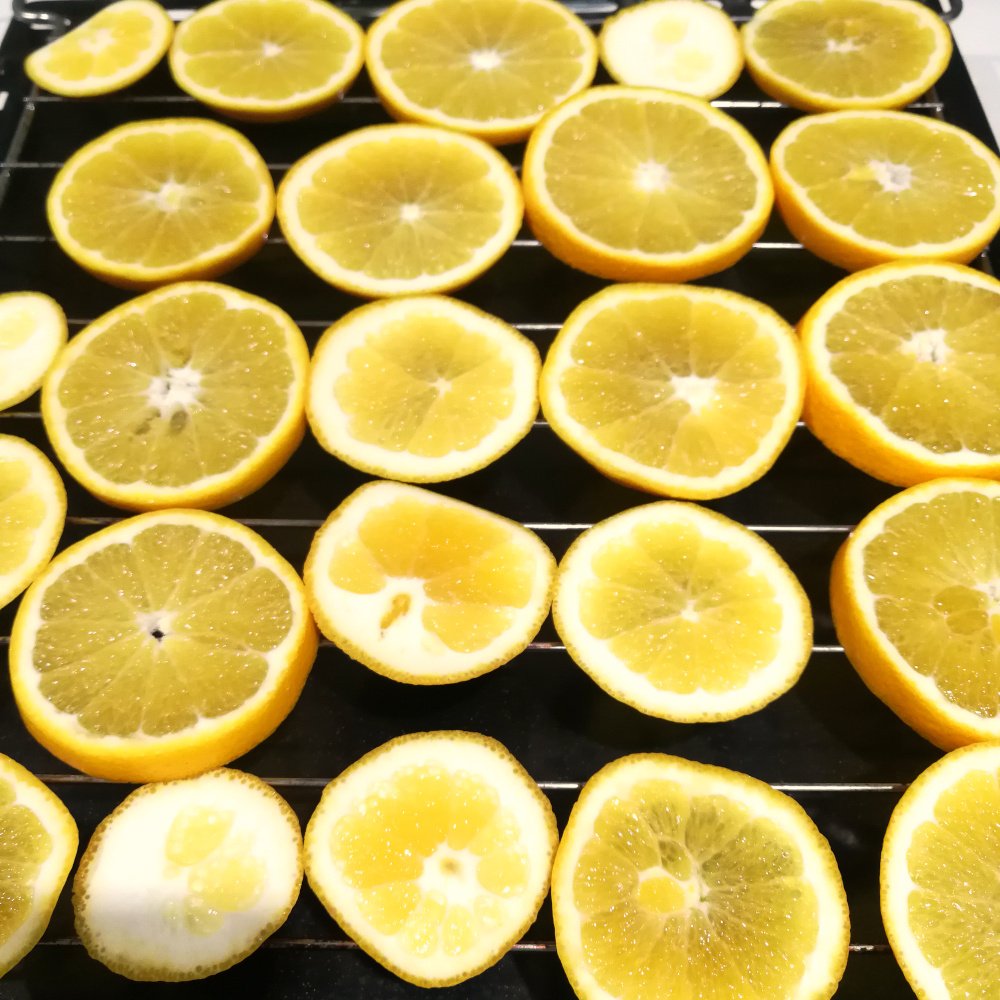
3. Next, place them on a metal rack on an oven tray. No need for baking paper here and in fact if you lay them on baking paper it will make them soggy. Using a metal rack makes sure that the air is distributed around and the slices dry evenly.
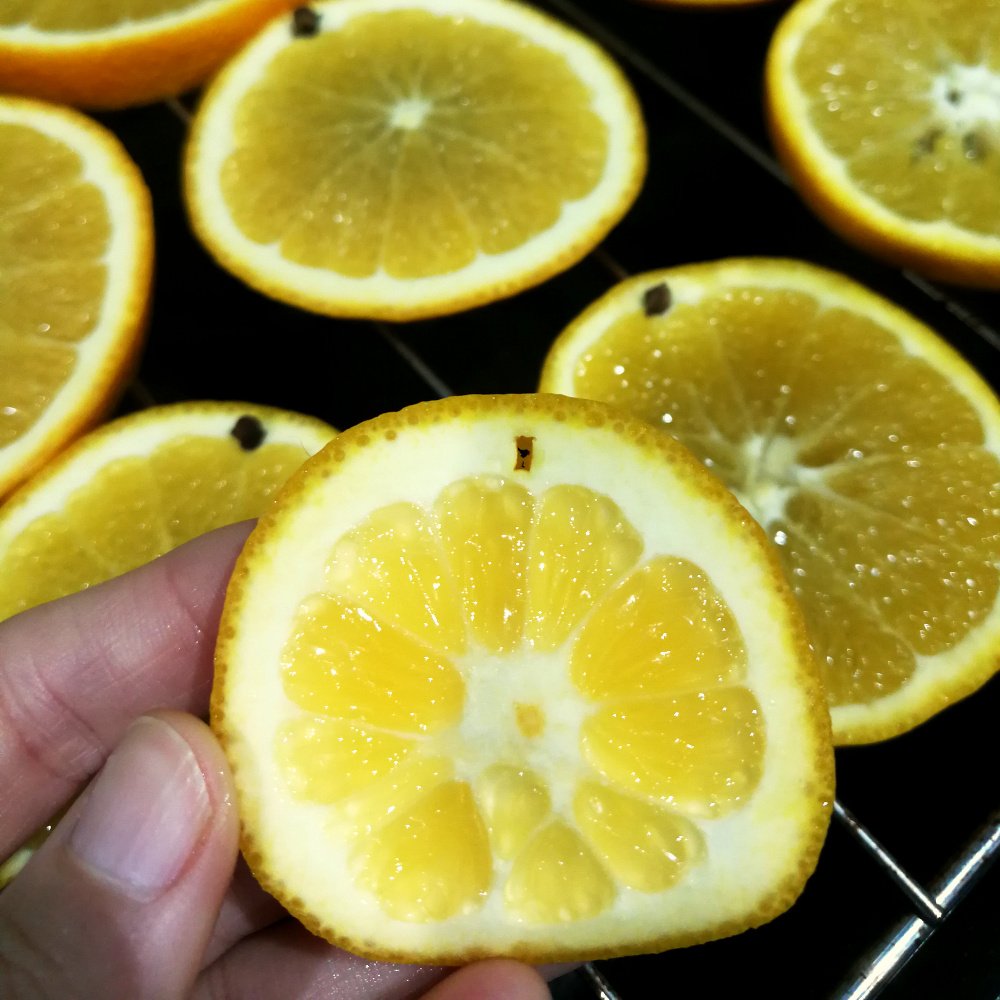
4. Push some cloves or another spice into the pith of each slice to add an extra Christmassy smell or leave as they are if you prefer.

5. Preheat the oven to about 80° celsius and dry for about 4hrs turning them every 40 mins.
6. Turn the oven off before they start to get a bit of colour and leave them in there as the oven cools.
7. If they still feel sticky then leave them out on your kitchen worktop to completely dry before using or storing.
How to Store Dried Orange Slices
I’m sure that once you have made your dried orange slices you will want to keep them for next year and the year after that. They need to be stored correctly to make sure they keep and don’t go mouldy.
Make sure they are completely dry before storing them, then wrap them in paper and store in a separate cardboard box in a cool dry place.
I would love to see your orange slice decorations. Let me know if you make them and how they turn out.