
How to Crochet a Magic Ring - Tutorial Five
It can seem daunting at first. I know it took me a fair few tries learning how to crochet a magic ring to get it right, but once you know step by step how to do it, it becomes really easy.
In this blog post, tutorial five of the How to Crochet Step by Step mini series, we’ll go through crocheting a magic circle together with a really easy to follow photo tutorial and a video, if you prefer to follow along with me.

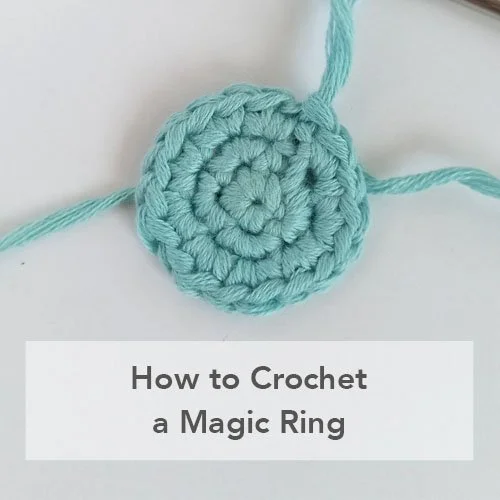
The beginning of a round project made with a magic ring.
What is a Magic Ring?
A magic ring is a specific way of creating the very centre of a round project so that you can tighten or loosen the centre gap.
We usually use it to tighten the gap in order to create a round starting point that is completely closed and almost invisible.
Magic Ring or Magic Circle?
A magic ring and a magic circle are the same thing. They are used interchangeably. There is literally no difference between the two phrases. It can also be called a magic loop.
When is a Magic Ring Useful?
You will probably want to make a magic ring if you are starting a crochet project that is worked in the round like a bowl, a toy or a hat.
Magic rings are especially useful when creating items that need to be stuffed like toys, amigurumi or even home decor like draught excluders because it means the stuffing won’t have any room to escape.
Mostly you need one if you want your starting point to be completely closed up and leave no holes.
Magic Ring v Chain and Join
The other option for starting a project in the round is to use the chain and join technique. This is literally chaining a set number of stitches and joining the two ends to make a ring.
By using this method, you are left with a circle of stitches with a gap in the centre that you cannot pull tight to close. If you are making amigurumi toys or something else with stuffing, the stuffing will likely come out through this gap.

This sample was made using the chain and join method.
Crochet projects made with a magic ring appear much more professional and the end product is evidently of a higher standard. So learning how to do it properly really is worth the time and effort.

How to Crochet a Magic Ring
The Video Tutorial
In this quick video tutorial for how to make a magic ring I show you how to make one the easy way so that you can get it right every time. Scroll down to the written information and photo tutorial.
Don’t forget to subscribe to my YouTube channel to get instant updates on new videos.
The Written Instructions with Photos
1. Start by holding the end of the yarn in your least dominant hand and the working yarn in your dominant hand. Below, I hold the end in my left and the working yarn in my right.
2. Using the hand that holds the working yarn, cross the yarn over the tops of your fingers on your other hand.
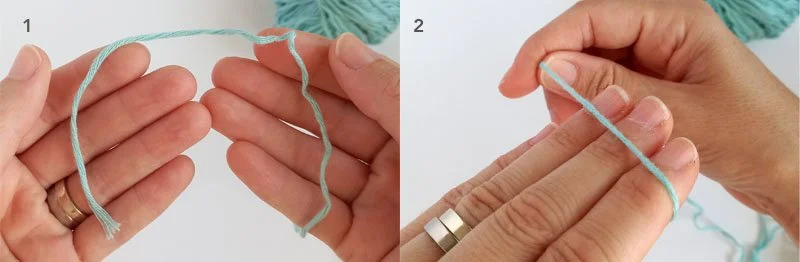
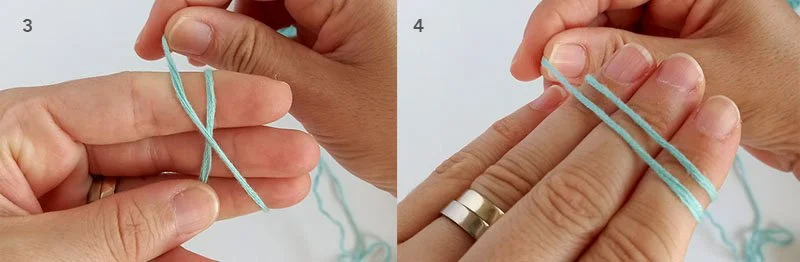
3. Continue wrapping the yarn underneath your fingers, making sure the yarn crosses over on the inside of your hand.
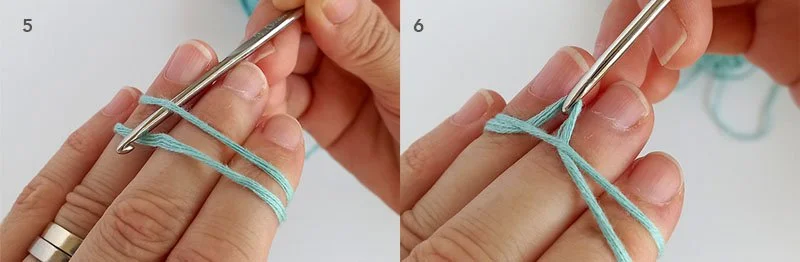
4. Then back over the top again, so that you have two strands across the tops of your fingers. Hold onto the working yarn with your little finger so it doesn’t move.
5. Take your crochet hook and place it underneath the first strand from your fingertips and hook onto the second strand.
6. Pull the second strand under the first.
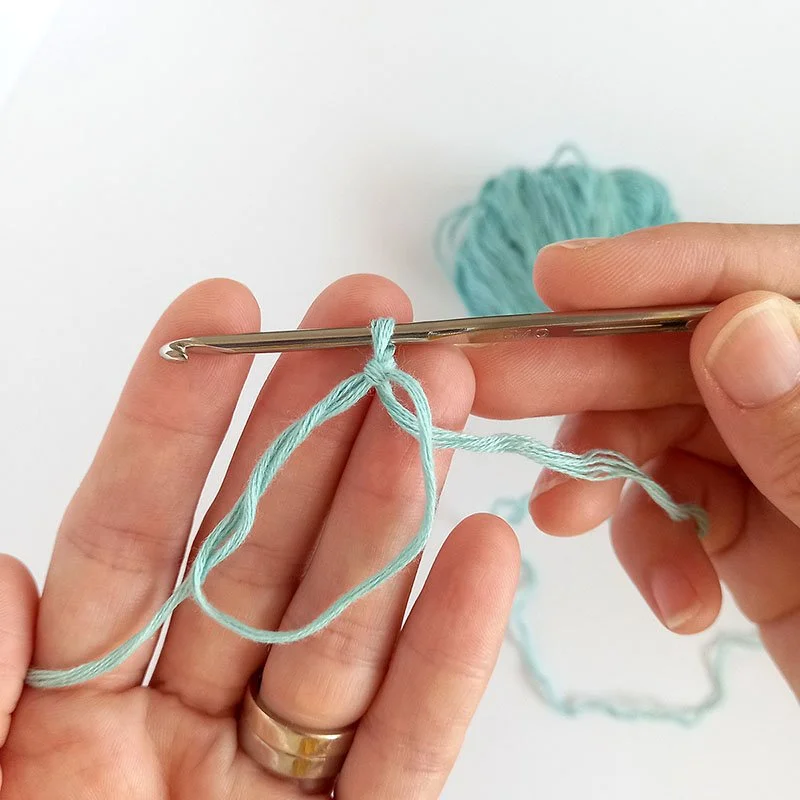
7. Now you have a half loop on your hook.
8. Twist your fingers anti-clockwise so that the loop on the hook is twisted and the hook is pointing towards the second strand.

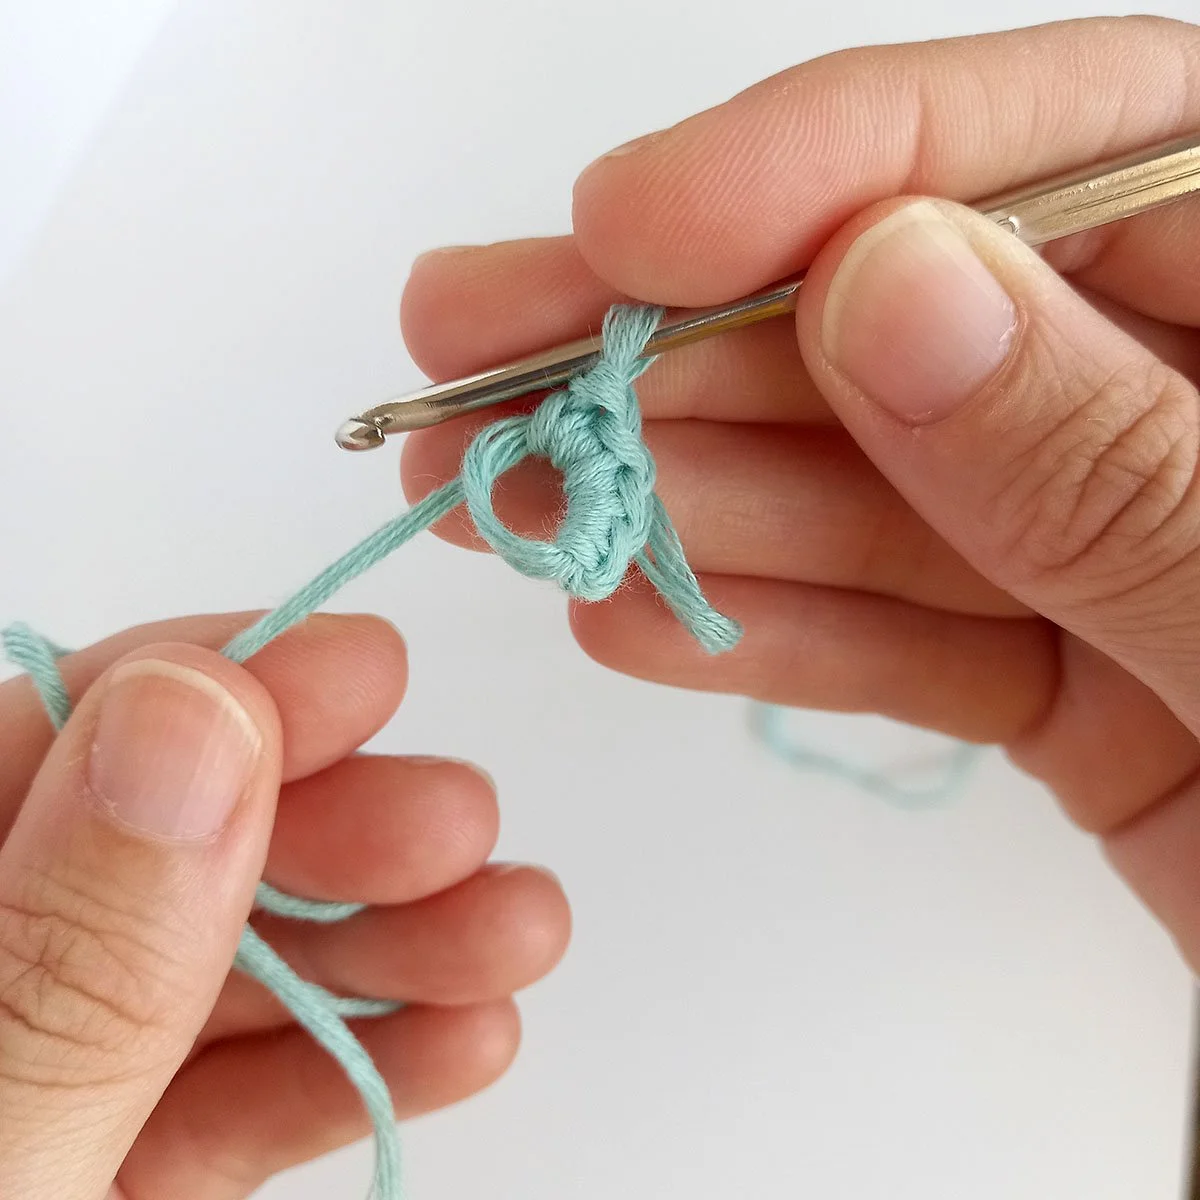
9. Hook onto the second strand again and pull it through the loop on your hook.
10. This creates your first proper loop on the hook.

Now you can remove your fingers from the circle. This is your magic ring!
You will used this ring to begin crocheting your first number of stitches. The stitches are worked into the circle and around the two strings of yarn (the ring and the yarn end).
Taking the single crochet stitch as an example, to make your first single crochet, put your hook into the centre of the ring, yarn over and pull up a loop, yarn over again and pull through both loops on the hook.
Continue making your beginning stitches into the circle, making sure to work over both strands of yarn.
At this point, you can test if the magic ring is working by pulling on the end of the yarn. Pull the end should tighten the circle. You can loosen it again by pulling at the circle itself.
When you’ve reached the number of stitches needed, tighten the circle and make a slip stitch into the first stitch to join the two ends.
This is where the magic happens, pull the end of the yarn until the gap in the centre closes completely. You may need to pull the end in various directions before it closes fully.
That’s it! You’re now ready to work your next row around these first set of stitches.
Make sure you get a notification about the next tutorial by subscribing to my YouTube channel.