
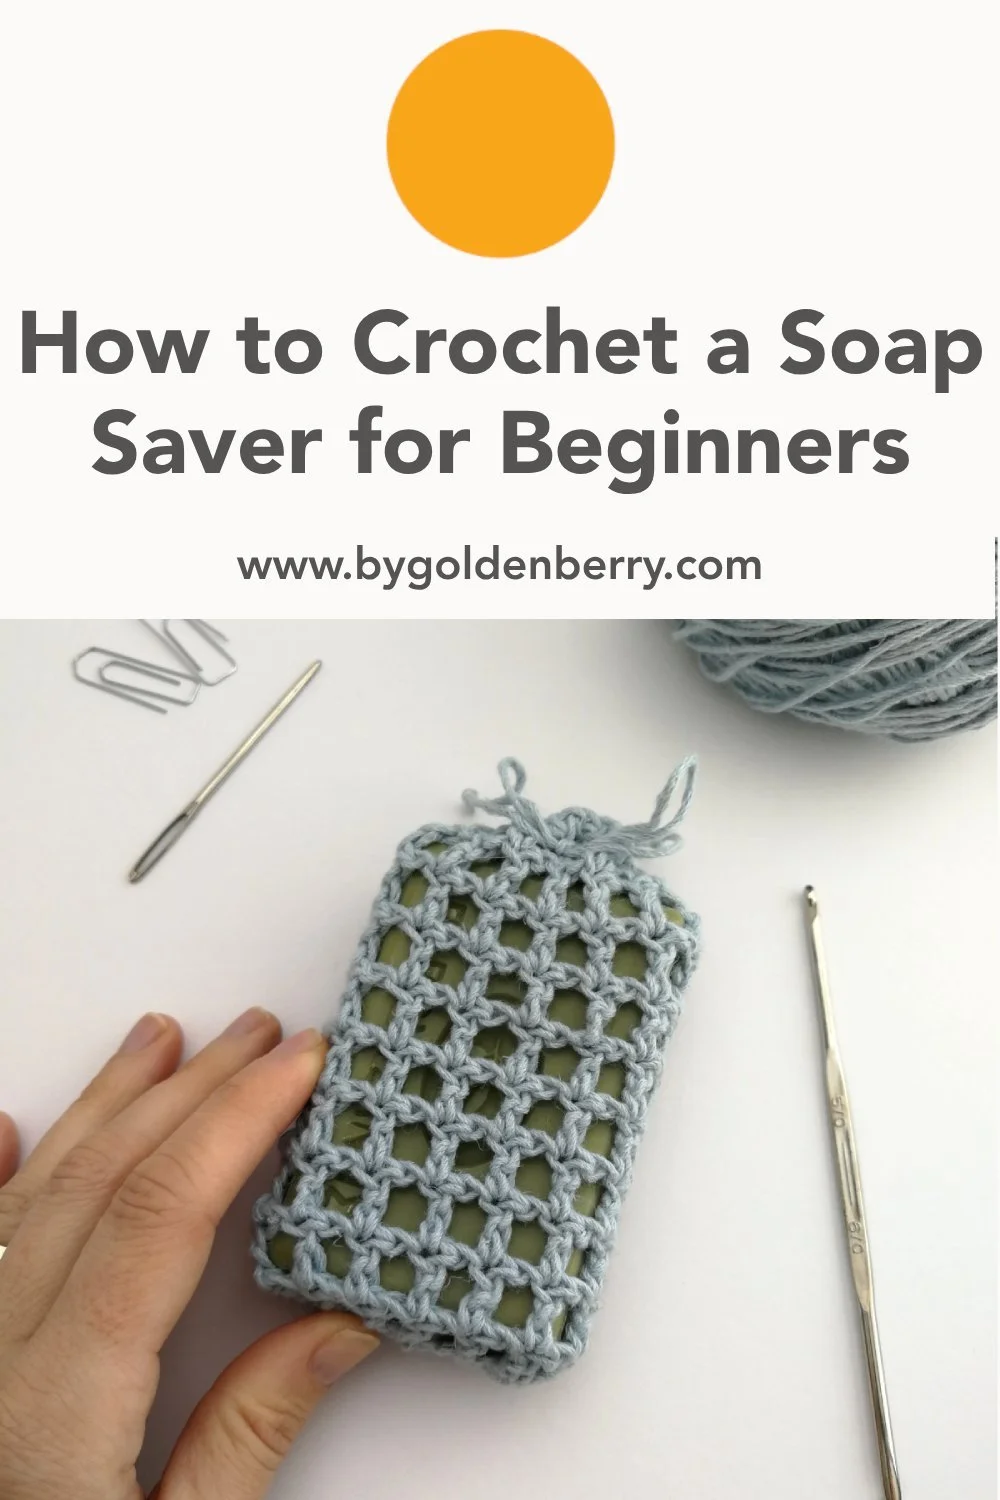
How to Crochet a Soap Saver for Beginners
The following article may contain affiliate links. This means that if you make a purchase from these links, I may receive affiliate commission at no additional cost to you.
The recommendations listed here are based on personal experience and the affiliate relationship in no way compromises the integrity of the suggestions. More about sustainable yarns.
This super easy crochet pattern teaches you how to crochet a soap saver even if you’re a complete beginner. This project can be your first zero waste swap using your new skill.
We'll go through each step together and you'll never have to buy another shower gel bottle again but instead support your local handmade soap maker!
This is a really quick and easy project that you can get started with today and come back to whenever you need. Once you’ve got the hang of this pattern you’ll be making them for all your friends too. They take no time at all and make a really lovely gift.
Check out more of my useful crochet projects on the blog.
Why Use a Soap Saver?
lThe fact that you are here suggests that you’ve already decided to use a soap saver but before we get started with how to crochet a soap saver let’s just go through some reasons why a soap saver is a great idea.
It means you can switch to soap, like I mentioned above. You can get rid of all those plastic bottles in the shower and switch to a lovely handmade soap instead. Saving on loads of waste.
You can support your local handmade soap maker. I’m sure there is one in your area you can get in touch with and your support will honestly mean the world to them.
Soap savers help you use every last bit of soap rather than bits accidentally falling off and ending up down the drain. All the bits stay in the bag and get used up.
The soap will last longer because it dries better in between washes and again all the soap stays in the bag rather than on a soap dish.
If you stick to using a plant based yarn like the suggestions mentioned above, it means it can be home composted at the end of its life, creating absolutely no waste!
Now that we know it’s a great little project, let’s get to it!
Skill Level: Easy
This soap saver pattern is so easy, you will have it done in no time at all. It does assume you know the basics of how to start a crochet project and the basic stitches. See below if you need help with getting started.
New to Crochet? Learn Step by Step


Find all the beginner crochet tutorials in my step by step guide.
Watch the Video
What Yarn to Use
Which Weight?
You can use any weight of yarn and any hook you like as we will be measuring the soap saver against our soap bars.
However, I recommend using a lace, sport, fingering or light DK weight yarn with a matching hook. A chunky/thick yarn won’t work as well.
Which Fiber?
Be sure to use a plant based yarn without toxic dyes as you will be using it in the shower/bath and you don’t want anything entering the water system that shouldn’t be there.
Acrylics, nylons and polyesters will shed micro plastics so aim for something like hemp, linen or organic or recycled cotton. I’ve included some suggestions below.
What I Used, Plus Other Suggestions
For this pattern, showing how to crochet a soap saver, I used roughly 25 yards of Natisseas Pernelle in Baby Blue, a 100% hemp yarn in fingering weight.
Other Yarn Suggestions
Here are some other options that I think would work really well.
Lion Brand - Linen Cone (100% Linen)
Conserving Threads - Nettle Yarn (100% Nettle)
LoveCrafts - Debbie Bliss Eco Baby Yarn (100% Organic Cotton)
Measurements
Depending on the yarn you use and the soap you have, your soap saver may end up a different size to mine.
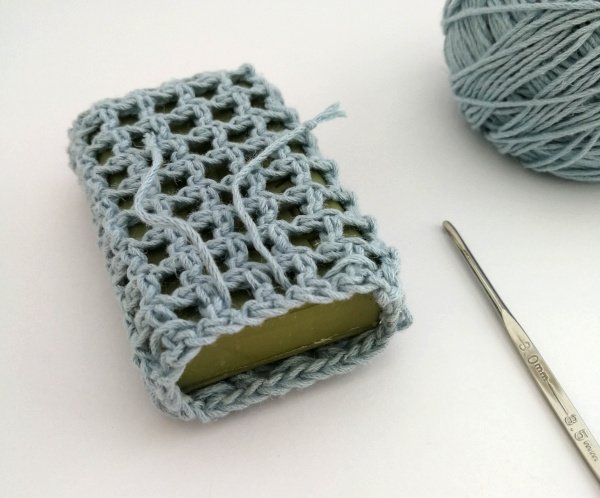
Mine measures 7cm (2.75 inches) x 11.5cm (4.5 inches).
What Else You Will Need
Hook: Choose a hook that matches the weight of your yarn. I used a 3mm hook. (3mm - Metric | 11 - UK & Canada | C-2 - US | 5/0 - Japan)
Scissors: For cutting the ends
Darningneedle: To weave in the ends
Stitch Markers (optional): 2 stitch markers
A Bar of Soap: To measure against
Abbreviations
Ch(s) = Chain(s)
St(s) = Stitch(es)
Yo = Yarn Over
Pt = Pull Through
prev. = Previous
Ss = Slip Stitch (Video tutorial)
Dc = Double Crochet (U.K. - Treble Crochet - Video tutorial)
(10) = Numbers in brackets at the end of rows show how many stitches you should have at that point.
** = Repeat instructions between the asterisks as many times as it states after the x or until the end of the round.
Gauge
Gauge isn’t important here because, as I mentioned above, we will be measuring the soap saver against our bars of soap.
Pattern Notes
Number of Chains and Stitches: We begin by measuring our foundation chain against our bar of soap, as such, there is no definitive number of chains to begin with or number of stitches at the end of each row.
I include how many chains I make and how many stitches I have at the end of the row for mine but yours may be different.
Turning Chains: The turning chains on each round count as the first stitch of the row. I have a full blog post about turning chains if you need a recap.
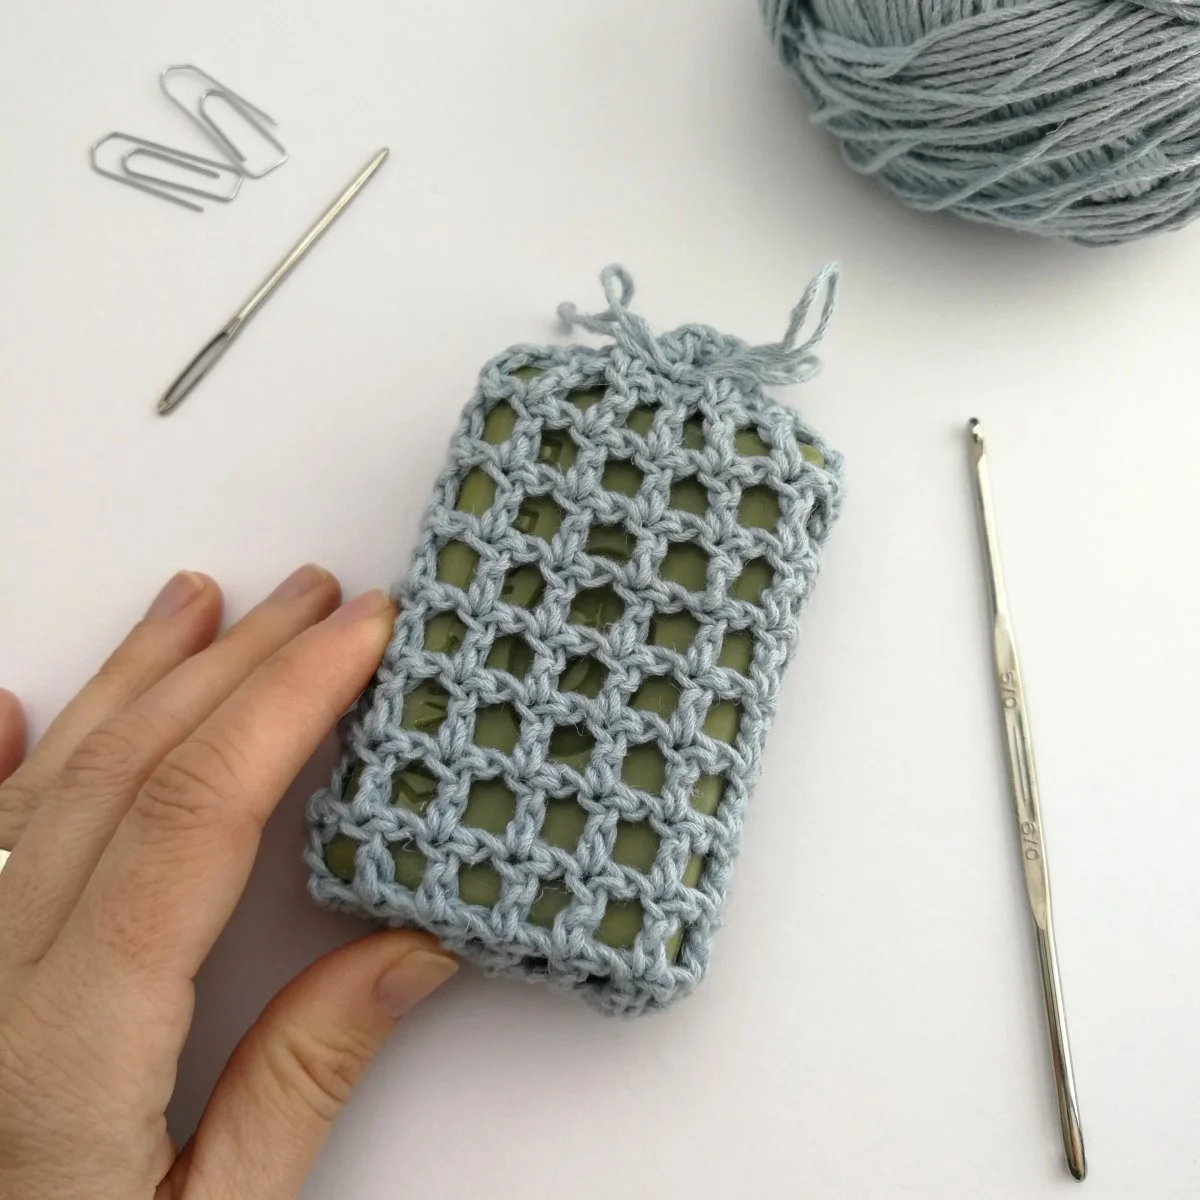
How to Crochet a Soap Saver
The Pattern
Make an uneven number of chains that measures roughly the width of your bar of soap if you are holding it in portrait mode. See the photo below for clarity.
I made 11 chs. Mark the last ch.
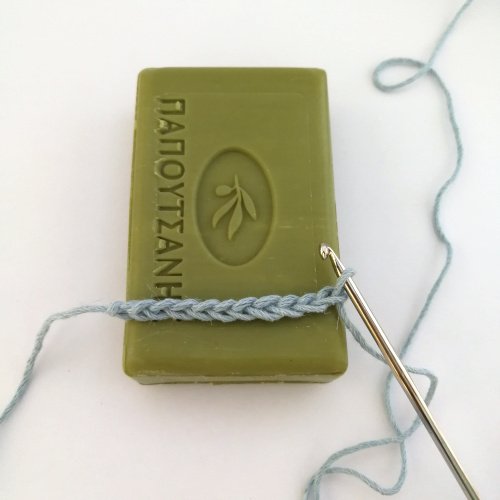
Round 1: Ch3 (counts as first st). Mark 3rd ch.

Ch1. Dc into 2nd ch from first marked ch. Pointed out in the above photo.
* Ch1. Skip ch. Dc into next. * Repeat until end of ch.

* Ch1. Dc into last foundation ch * x 2.
Pivot your work so the underside of the foundation ch is on top.

The underside of the foundation chain is now facing upwards.
* Ch1. Skip ch. Dc into next. * Repeat until you reach the marked ch.
Ch1. Make another dc into marked ch.
Ch1. Ss into second marked ch.
Remove markers. Your dcs should all line up. (28 sts, 14 dcs)

Round 2: Ch3 (counts as first st). Mark 3rd ch.
* Ch1. Skip ch1 of prev. round. Dc into dc of prev. round. See photo below * Repeat all the way around making your last dc into the dc before the ch3.

Ch1. Ss into marked ch.


This is what you should have after round 2. A little boat shape.
You should have the same number of sts and dcs as the prev round.
Round 3 - end: Repeat round 2 until you reach the desired length. I made 10 rounds in total for mine.
Fasten off and weave your ends to secure.
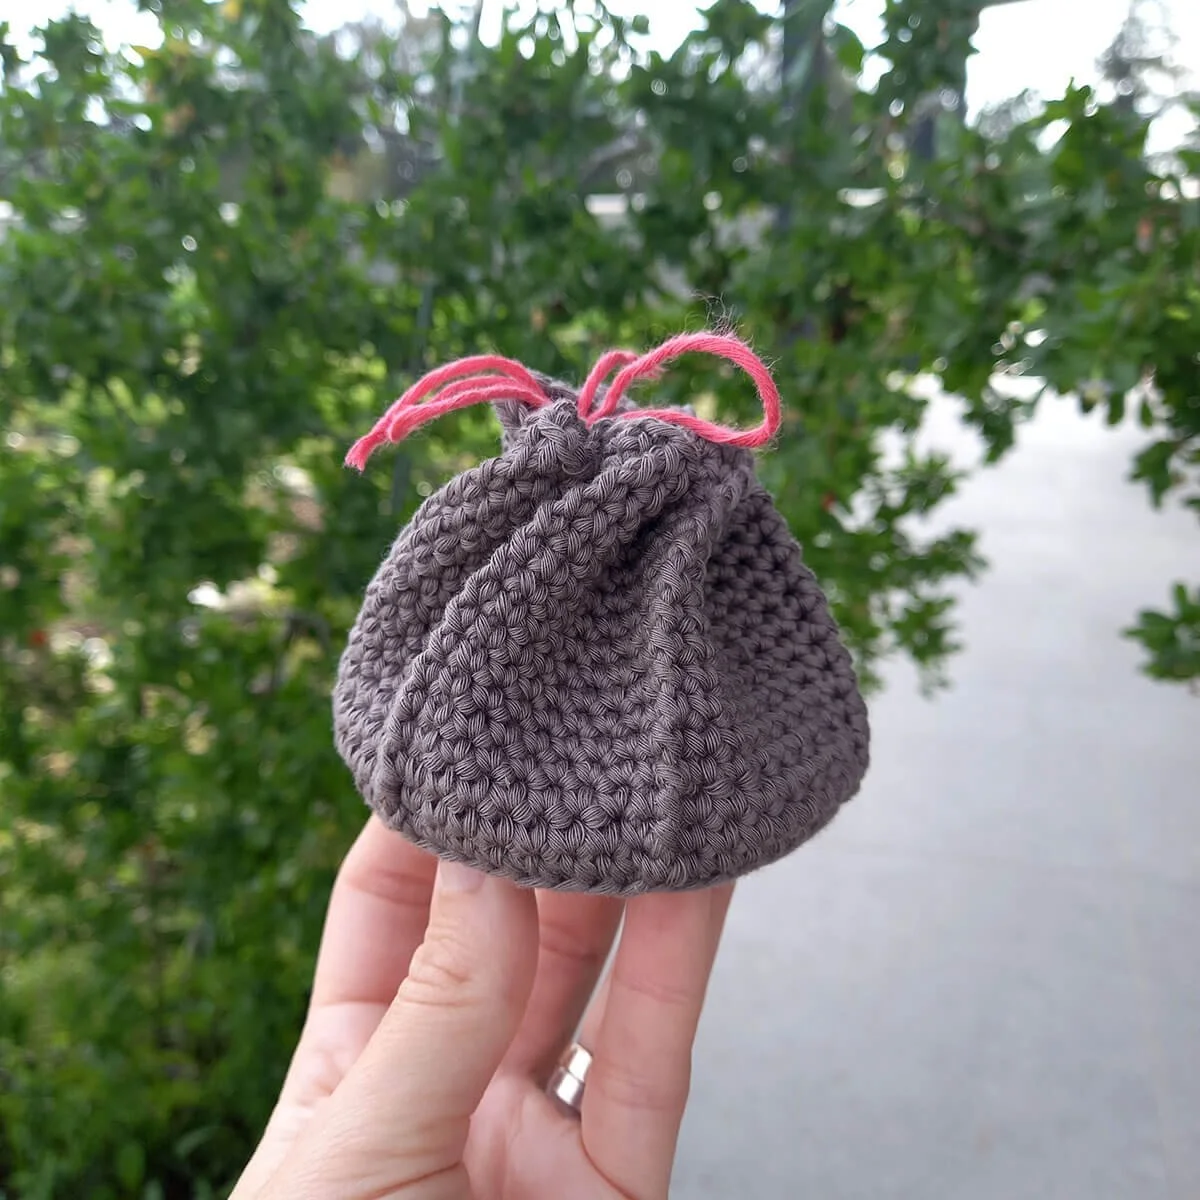
Making the Drawstring
Weave a length of yarn through one of the front, central chain spaces of the last round. Then weave in and out of the chain spaces all the way around until you come back to the front.

Cut the end and make a knot in both ends so they don’t fray. Pull these ends to close the top of the soap saver like a drawstring bag.
And that’s it!
You now have your own soap saver ready to use. I really hope you enjoyed this pattern. If you have any questions, pop them in the comments below and I will help however I can.