Free Coaster Crochet Pattern with a Geometric Style
The following article may contain affiliate links. This means that if you make a purchase from these links, I may receive affiliate commission at no additional cost to you.
The recommendations listed here are based on personal experience and the affiliate relationship in no way compromises the integrity of the suggestions. More about sustainable yarns.
There are so many free coaster crochet patterns on the web right now but if you want to make something a little bit different then you’re in the right place.
The Melini Geometric Coaster was designed for a minimalist home and with sustainable yarn to ensure it is a welcome addition to your eco friendly lifestyle.
With two triangles making up the square, it is easy to add a touch of colour to match your current interior or make a whole range of colours so that you can mix and match on your coffee table.

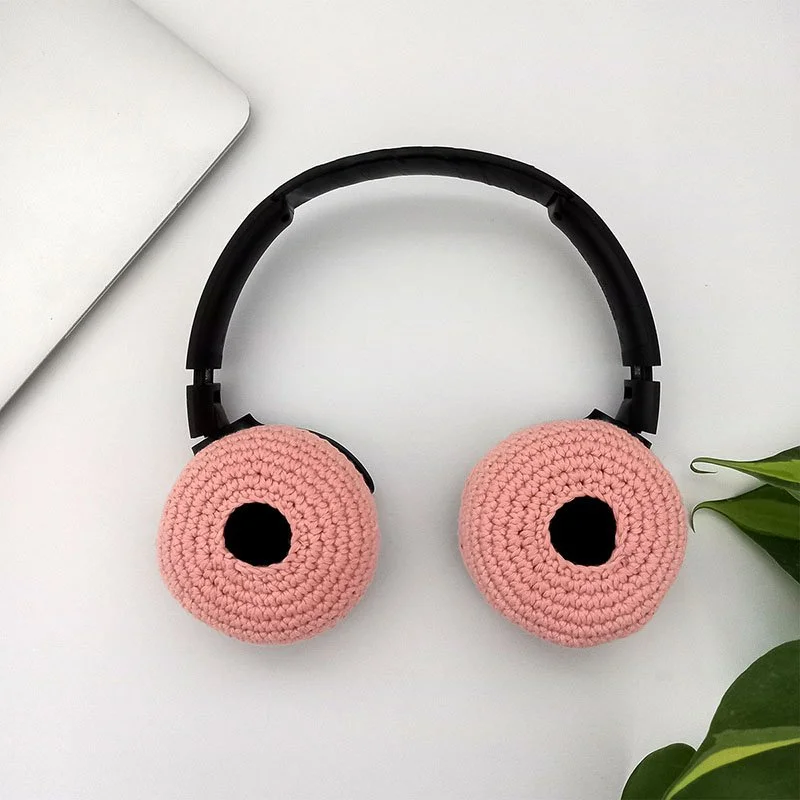
The thing I love about this free coaster crochet pattern is that, if made with a sustainable yarn like hemp or organic cotton, like these pictured above, your coasters will eventually leave no waste.
They will soak up all your spills, be ok in the wash and eventually when they have been used for years and need replacing, you can just pop them into your compost.
This coaster crochet pattern is completely free on this page. However, if you would like to support my work you can buy the AD FREE, downloadable PDF with more photos in my shop.
You can also buy this pattern on

The Free Coaster Crochet Pattern
Skill Level: Intermediate
I have marked this pattern as intermediate because we will be working stitches down the side of our work which can but other than that it is fairly simple.
Yarn
In total, approx 75 yards, 70 meters, 50 grams of DK weight yarn to make four coasters. I used a mix of hemp and organic cotton for mine.
Colour A: Approx 50 yards, 45 meters, 25 grams of Natissea’s Damya for the coloured triangle.
Colour B: Approx 25 yards, 25 meters, 25 grams of hemp yarn in DK weight for the neutral colour.
Alternative Yarn Suggestions
Another sustainable yarn that would work really well for this project is:
LoveCrafts, Deramores Studio Organic Cotton (100% Organic Cotton)
Measurements
8.5cm x 8.5cm (3.25” x 3.25”) approx
What Else You Will Need
Hook: 4mm - Metric | 8 - UK & Canada | G-6 - US | 7/0 - Japan
Scissors: For cutting your ends
Darning Needle: For weaving in your ends
Stitch Markers: To help keep track of specific stitches and mark the corners.
Abbreviations
Ch = Chain
St(s) = Stitch(es)
Ss = Slip Stitch
Yo = Yarn Over
Pt = Pull Through
prev. = Previous
Italicised text = These are extra notes to help with the instructions.
Sc = Single Crochet (U.K. - Double Crochet - YouTube Tutorial)
Flo = Front Loop Only
Blo = Back Loop Only
Sc2tog = Single Crochet 2 Together (U.K. - Double Crochet 2 Together)
(10) = Numbers in brackets at the end of rows, show how many stitches you should have at that point.
Gauge
14 sc and 16 rows = 10cm (4”)

The Free Coaster Crochet Pattern
First Triangle
With two stands of colour A held together, ch 10. Mark last st.
Row 1: Ch 1. Sc into marked st (leave marker in place). Sc til end (10). Turn.
Row 2: Ch 1. Flo sc into next 8 sts. Flo sc2tog. (9) Turn.
Row 3: Ch 1. Blo sc2tog. Blo sc into next 7 sts. (8) Turn.
Row 4: Ch 1. Flo sc into next 6 sts. Flo sc2tog. (7) Turn.
Row 5: Ch 1. Blo sc2tog. Blo sc into next 5 sts. (6) Turn.
Row 6: Ch 1. Flo sc into next 4 sts. Flo sc2tog. (5) Turn.
Row 7: Ch 1. Blo sc2tog. Blo sc into next 3 sts. (4) Turn.
Row 8: Ch 1. Flo sc into next 2 sts. Flo sc2tog. (3) Turn.
Row 9: Ch 1. Blo sc2tog. Blo sc into next st. (2) Turn.
Row 10: Ch 1. Flo sc2tog, making the last yo and pt with colour B. (1) Do not turn. Mark this last st.
Second Triangle
Continuing with colour B.
Row 1: Ch 1. Make 10 sc evenly down the side of the first triangle (1 sc for each row). 2 sc into last ch of foundation ch (marked st). (12) Turn.
Row 2: Ch 1. Blo sc into next 11 sts. Blo sc2tog (last st + ch 1). (12) Turn.
Row 3: Ch 1. Flo sc into next 11 sts. Leave the last st unworked. (11) Turn.
Row 4: Skip first st. Blo sc into next 8 sts. Blo sc2tog. (9) Turn.
Row 5: Ch 1. Flo sc into next 8 sts. Leave the last st unworked. (8) Turn.
Row 6: Skip first st. Blo sc into next 5 sts. Blo sc2tog. (6) Turn.
Row 7: Ch 1. Flo sc into next 5 sts. Leave the last st unworked. (5) Turn.
Row 8: Skip first st. Blo sc into next 2 sts. Blo sc2tog. (3) Turn.
Row 9: Ch 1. Flo sc into next 2 sts. Leave the last st unworked. (2) Turn.
Row 10: Skip first st. Blo sc into next st. (1) Do not turn.
Working the Border
Top: Working in an anticlockwise direction, sc 9 along the top of the second triangle and mark first st (make less in the beginning and more towards the middle and end to help pull the corner back a little). Make 3 sc into the marked st of the first triangle. Mark 11th st. (12)
First side: Make 10 sc evenly down the side of the square (work the 10th st into the first foundation ch). Work one extra sc into the last st. Mark 10th st. (11)
Base: Make 10 sc evenly along the bottom of the square (work 9 sc into the first triangle and the 10th sc into the second). Work one extra sc into the last st. Mark 11th st. (11)
Second Side: Make 10 sc up the second side of the square making more in the beginning and less at the end to help pull the corner down a little. Mark 10th st. (10) (You will have a small gap between the last st of the border and the first.)
Invisible Finish
Cut your yarn and pull the loop up so that the end of the yarn is pulled through the st. Weave the end of the yarn under both loops of the 1st sc of the border (marked). Weave the end back through the centre of the last st from the top. Pull tight so that the new st doesn’t show. This will close the gap and create a corner. (44)
Your coaster is nearly done. It may still look slightly wonky so make sure to block them as described below, making sure to pin the corners into a square, to straighten the edges and flatten the coaster.
Blocking
Submerge your coasters into water until you feel they are saturated. Squeeze them out gently and flatten them out onto a drying matt or a towel on top of cardboard to help soak up the moisture quicker. Use the corner markers to pin the coaster into place and into a square shape. Leave to dry. Once fully dry your coasters are ready to use!